
F5200
COMPACT LEAK TESTER FOR INDUSTRIAL QUALITY CONTROL
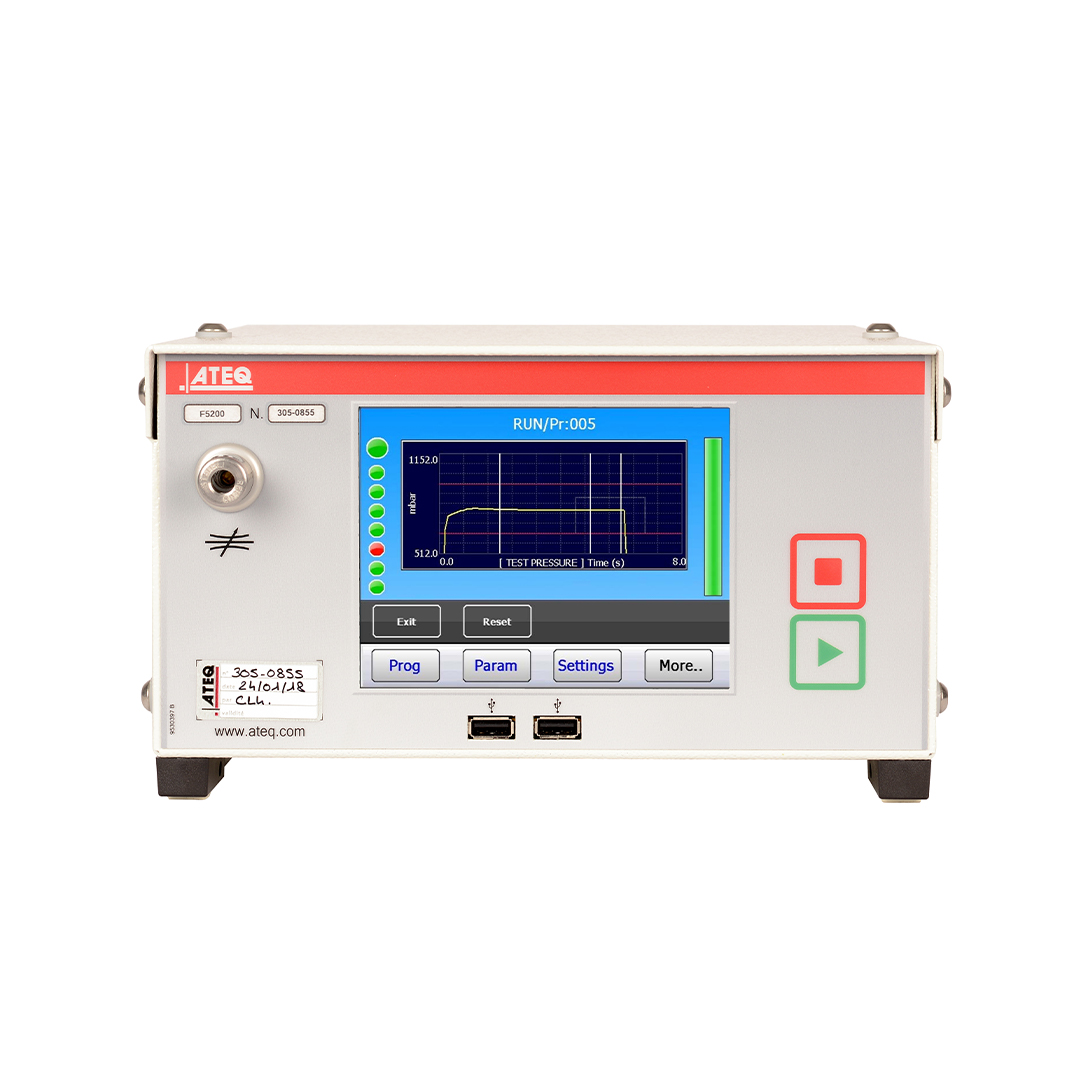
The ATEQ F5200 in its compact format is the easiest leak detector to operate and integrate into manufacturing operations. Its comprehensive specifications, including ATEQ’s latest developments in pressure decay technology, make it an extremely versatile instrument.
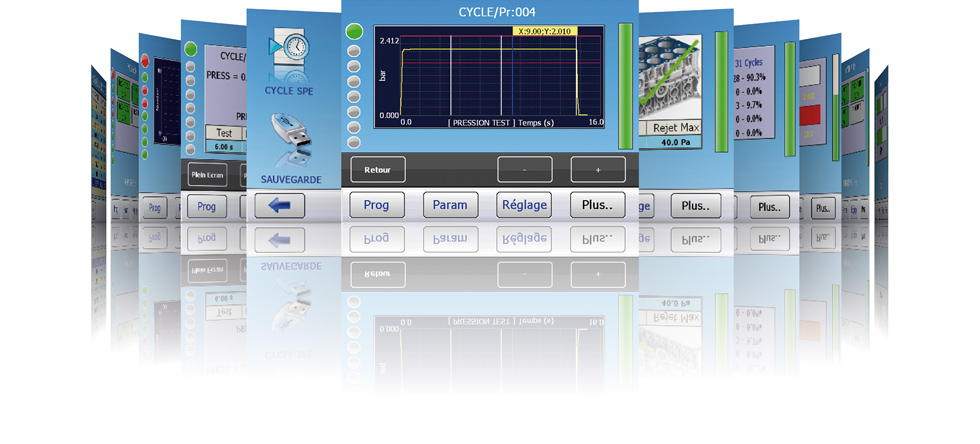
The F5200 offers a touchscreen graphical interface to combine great functionality with simplicity of use with simple and intuitive menu-driven operator controls.
F5200: APPLICATIONS
AUTOMOTIVE
- Air Conditioning
- Radiators
- Exhaust
- Transmission…
PACKAGINGS
- Aerosol Caps
- Plastic Bags
- Sprays
- Plastic Bottles…
ELECTRONICS
- Hard Disk
- Watches
- TV Screen
- Camera Lenses…
MEDICAL
F5200: FEATURES
• Differential pressure decay leak measurement
• Large ranges of leak measurement (ΔP) F.S. : 50 Pa, 500 Pa ou 5000 Pa
• 32 programs
• Set-up on-line (via USB port)
• 2 languages (English + other one)
• Manual calibration on front panel with calibrated leak
TEST MODES :
• ΔP (Pa, 1/10 Pa)
• ΔP / Δt (Pa/s, 1/10 Pa/s)
• Flow units (mm3/s, cm3/s, cm3/min, cm3/h)
• Blockage test
• And others, depending on your applications
ENVIRONMENT :
ROHS standard
FLEXIBLE COMMUNICATION FORMAT :
• RS232: printer / Bar code reader
• Slave USB: supervision
• Master USB: USB key to transfer (parameters, results, curves, statistics…)
• Ethernet: email alert/ Modbus IP
• Option: profibus, devicenet
MEASUREMENT CHARACTERISTICS :
| TEST PRESSURE MEASUREMENT |
|---|
| Range | Accuracy up to* | Max. Resolution |
|---|---|---|
| F.S. = 75 mBar* | ± (1.5% of the P + 0.2 hPa) | 0.1% of the Full Scale |
| F.S. < 0.3 bar | ± (1.5% of the P + 1 hPa) | 0.1% of the Full Scale |
| 0.3 < F.S. < 1 bar | ± (1.5% of the P + 3 hPa) | 0.1% of the Full Scale |
| 1 < F.S. < 5 bar | ± (1.5% of the P + 7.5 hPa) | 0.1% of the Full Scale |
| 5 < F.S. < 10 bar | ± (1.5% of the P + 15 hPa) | 0.1% of the Full Scale |
| 10 < F.S. < 20 bar | ± (1.5% of the P + 30 hPa) | 0.1% of the Full Scale |
| PRESSURE DROP MEASUREMENT |
|---|
| Range | Accuracy up to* | Max. Resolution |
|---|---|---|
| 0 – 50 Pa | ± (2% of the P + 0.5 Pa) | 0.01 Pa |
| 0 – 500 Pa | ± (2.5% of the P + 1 Pa) | 0.1 Pa |
| 0 – 5000 Pa | ± (2.5% of the P + 10 Pa) | 1 Pa |
Accuracy: Linearity + Repeatability + Hysteresis *Optional Laboratory Accuracy.
Electronic Pressure Regulation: Vacuum / 1-10 kPa / 5-50 kPa / 20-200 kPa / 50-500 kPa / 100-1000 kPa / 100-1600 kPa / 100-2000 kPa
F5200: SPECIFICATIONS
PHYSICAL
- Weight: 6 Kg
- Dimensions : (WxHxD) 250x136x367 mm
- ELECTRICAL SUPPLY
- 90 – 260 V AC / 1.6 A
- TEMPERATURE
- Operating: + 0°C at + 45°C
- Storage: 0°C at + 60°C
- INTERFACE
- Graphic color screen with simple and intuitive menu-driven operator controls
- AIR SUPPLY
- Clean and dry air
- Air quality standard to be applied (ISO 8573-1)
- Clean and dry air
F5200: OPTIONS
• 7 inputs / 5 outputs
• Electronic regulator
• Dual pressure
• Automatic calibration check
• 2 pneumatic outputs for control of sealing connectors
• 6 x 24 V programmable outputs for external automation

F5200: TECHNOLOGY
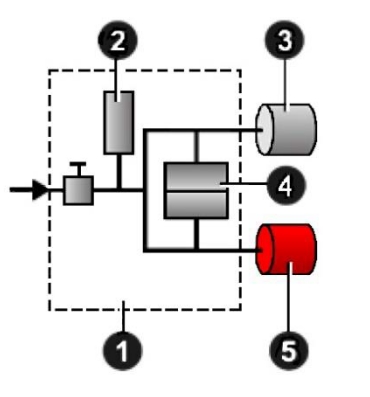
By far the most popular technology, differential pressure decay uses a reference volume to test your part. This helps compensate for any ambient pressure or temperature variations as they occur on both parts simultaneously.
Only a leak on the test part will result in a movement of our transducer’s membrane.
The second advantage of this method is that the accuracy does not drop with the test pressure as the transducer is measuring pressure differences between the two circuits, as opposed to the traditional pressure decay technology that measures pressure drops against the atmosphere.
Direct measurement principle
The part under test 3 and the reference part 5 are filled to an identical pressure. A differential sensor 4 measures the pressure variation between the part under test 3 and the reference part 5. In some applications, the reference part can be replaced by a cap.

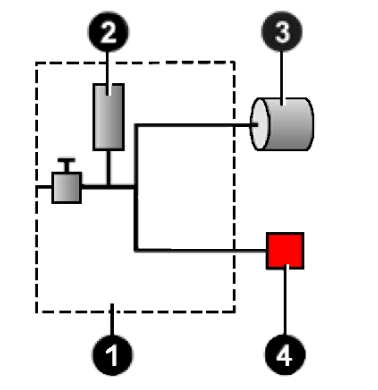
Desensitized test
This mode is used for the measurement of large leaks, when the reject level required is above the full scale of the differential sensor.
The test pressure is applied to the input of the part under test 3. The measurement is performed by the pressure sensor 2.
Other type of tests are available in option

