Leak Tester for industrial quality control

F620

LEAK TEST INSTRUMENT FOR INDUSTRIAL QUALITY CONTROL

With over 40 years of experience and 275,000 testers installed for more than 5,000 customers worldwide, ATEQ introduces its revolutionary leak tester range: the F6 series, which includes the compact leak tester F620, the weatherproof leak tester F610, and the F670 in its 19″3U industrial format

New electronic module, new measurement module, new interface, new accessories… Everything has been designed to improve your quality control.

Yet, within it houses the latest leak testing techniques and technology, ensuring the fastest and most precise leak testing cycle available on the market.

CONTACT US

F620: APPLICATIONS

  • AUTOMOTIVE

    • Air Conditioning
    • Radiators
    • Exhaust
    • Transmission…
  • PACKAGINGS

    • Aerosol Caps
    • Plastic Bags
    • Sprays
    • Plastic Bottles…
  • ELECTRONICS

    • Hard Disk
    • Watches
    • TV Screen
    • Camera Lenses…

F620: FEATURES

• Differential pressure decay leak measurement
• Large range of leak measurement (∆P) F.S.: 50 Pa, 500 Pa or 5000 Pa
• Mechanical or electronic regulator from vacuum to 20 bar
• 128 programs
• Setting on line (via USB)
• 2 languages (English + another one)
• Manual calibration on front panel with calibrated leak
• Data storage on internal memory or USB key

TEST MODES :

• ∆P (Pa, 1/10 Pa)
• ∆P/t (Pa/s, 1/10 Pa/s)
• Flow units (sccm, mm3/s, cm3/s, cm3/min, cm3/h…)
• Blockage test
• Burst test
• Sealed components test
• And others, depending on your applications

ENVIRONMENT :
ROHS standard

FLEXIBLE COMMUNICATION FORMAT :

• RS232: Printer, Modbus RTU
• Slave USB: PC supervision (WinAteq 300, sesame)
• Master USB: USB key to transfer (parameters, results, …)
• Option Fieldbus: Profibus, Devicenet, Profinet, Ethernet/IP

MEASUREMENT CHARACTERISTICS:

PRESSURE DROP MEASUREMENT
Range Accuracy up to* Max. Resolution
20Pa** ± (2.0% Reading + 0.05 Pa) 0.001 Pa
50Pa ± (1.0% Reading + 0.5 Pa) 0.01 Pa
500 Pa ± (0.5% Reading + 0.5 Pa) 0.1 Pa
5000 Pa ± (0.5% Reading + 5 Pa) 1 Pa

Accuracy: Linearity + Repeatability + Hysteresis *Optional Laboratory Accuracy **Maximum Test Pressure 3 bar

F620: SPECIFICATIONS

  • PHYSICAL

    • Weight: 7 Kg
    • Dimensions: (WxHxD) 250x150x360 mm
  • ELECTRICAL SUPPLY

    • 24VDC/2A or 100-240VAC/50W
  • TEMPERATURE

    • Operating: + 5°C at + 45°C
    • Storage: 0°C at + 60°C
  • INTERFACE

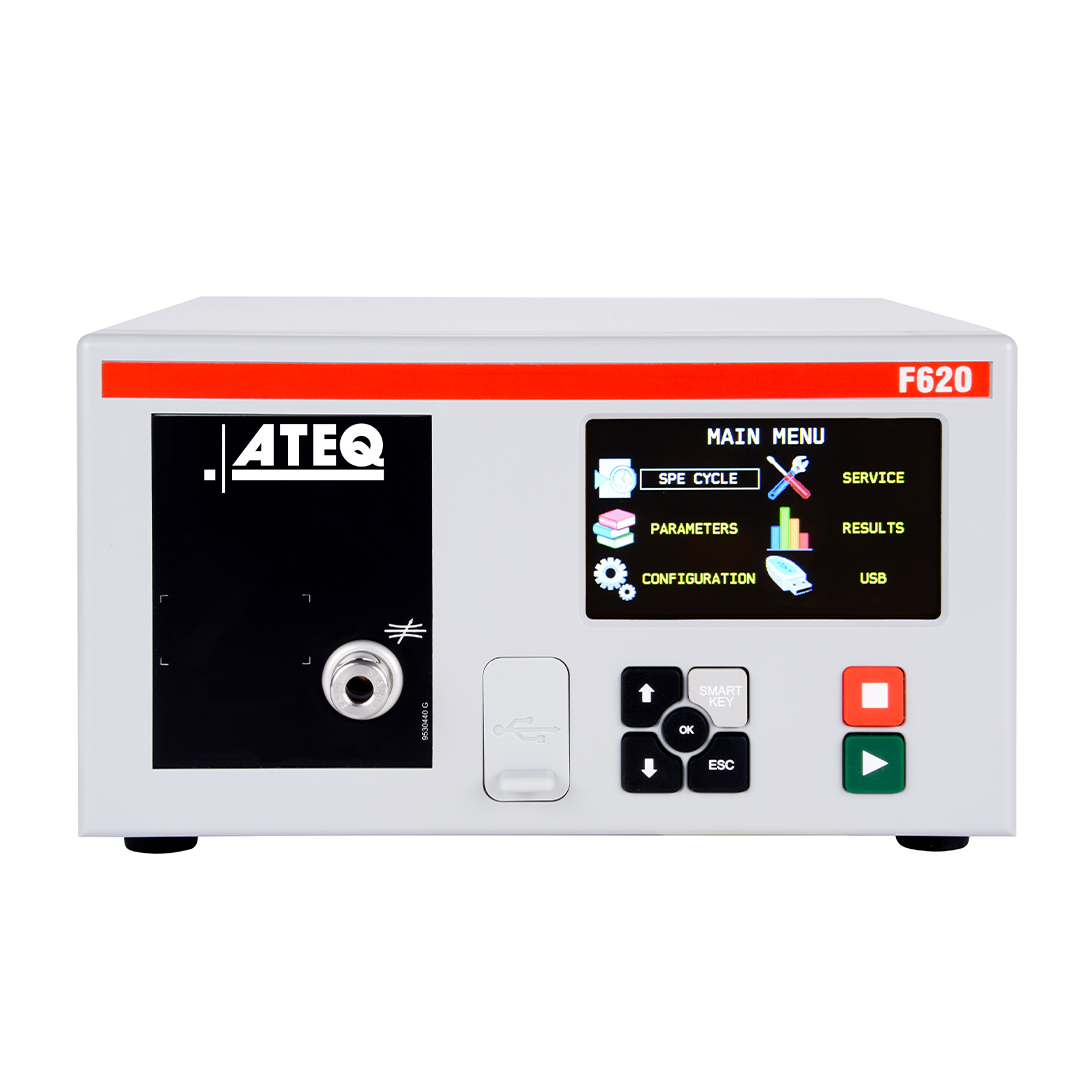
    • Graphic color screen with simple and intuitive menu-driven operator controls
    • SMART KEY: programmable key with user’s functions
  • AIR SUPPLY

    • Command 4/6 bar
    • Pressure 1 or 2 bar > test pressure
    • Clean and dry air
    • Air quality standard to be applied (ISO 8573-1)

F620: OPTIONS

• 9 inputs / 5 local outputs compatible with 5 series instruments
• 6 inputs/ 6 outputs 24 V programmable for external automation
• Electronic regulator
• Dual pressure
• Automatic calibration check
• 2 pneumatic outputs for control of sealing connectors
• Memory card for archiving results (1 million)

F620: TECHNOLOGY

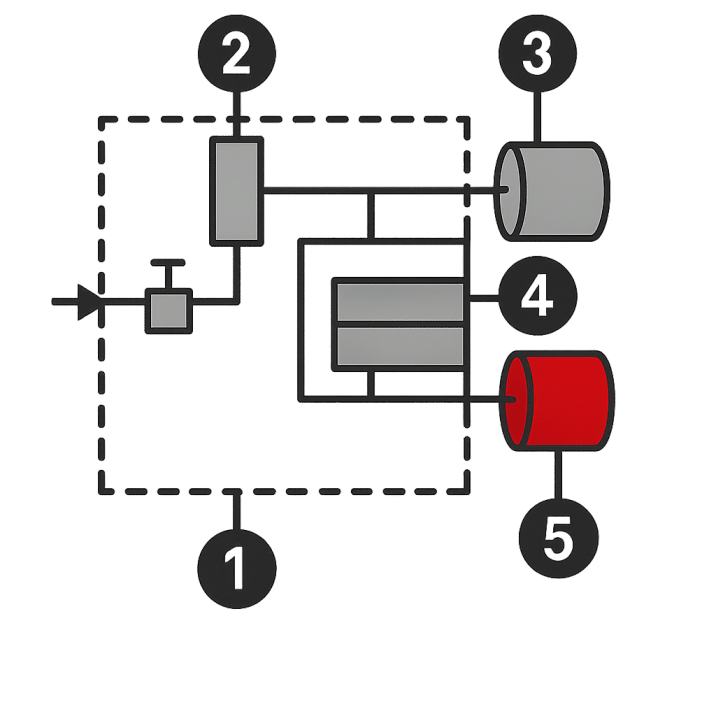
By far the most popular technology, differential pressure decay uses a reference volume to test your part. This helps compensate for any ambient pressure or temperature variations as they occur on both parts simultaneously.
Only a leak on the test part will result in a movement of our transducer’s membrane.

The second advantage of this method is that the accuracy does not drop with the test pressure as the transducer is measuring pressure differences between the two circuits, as opposed to the traditional pressure decay technology that measures pressure drops against the atmosphere.

Direct measurement principle
The part under test 3 and the reference part 5 are filled to an identical pressure. A differential sensor 4 measures the pressure variation between the part under test  3 and the reference part 5. In some applications, the reference part can be replaced by a cap.

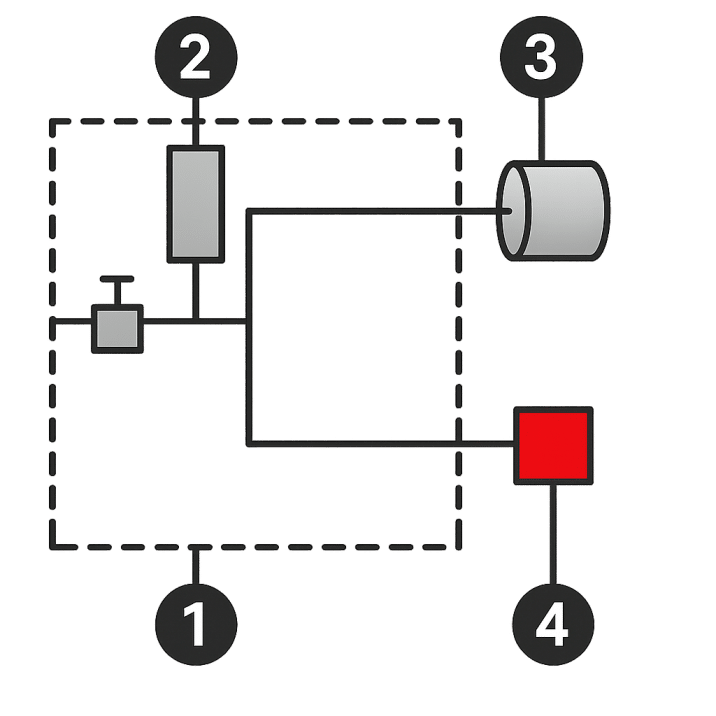
Desensitized test
This  mode  is  used  for  the  measurement  of  large  leaks,  when  the  reject  level  required  is above the full scale of the differential sensor.
The  test  pressure  is  applied  to  the  input  of  the  part  under  test  3.  The  measurement  is performed by the pressure sensor 2.

Other type of tests are available in option

F620: FACTSHEETS

[US] – F620

[MX] – F620

[FR] – F620

SUBSCRIBE TO OUR MONTHLY NEWSLETTER!

SUBSCRIBE NOW